4/6/2010
That's right, I am back with the final post before baby Zelda Rae joins us (just 2 more days)! I wasn't expecting to have so much to share, but I have managed to crank out a few last minute items, so I am pleased with where I am with this impending break in craftiness. So lets get started, I have lots of other things to do in these next 2 days too.
First up, the last of the prefolds from Q have been used, finally (I couldn't belive how many I saved)...
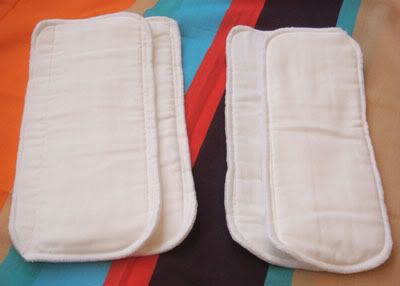
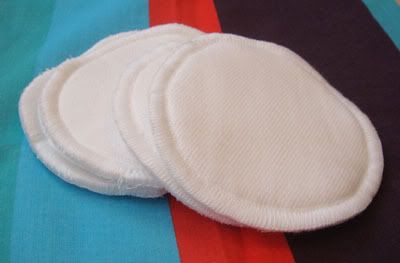
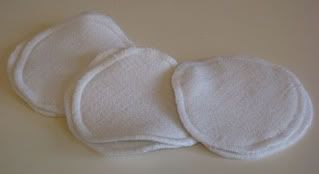
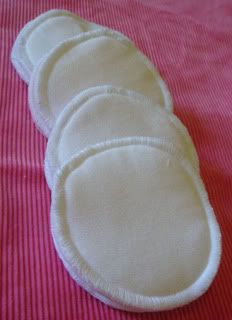
I hopped on the serger and whipped up 2 extra soakers for each of the cloth diapers I have gotten so far (1 is a Fuzzibuns One Size and the other is the bumGenius One Size), I figured you can always use extra soakers. These were so easy, I just traced the ones that came with the diapers onto the prefold and stuffed them into the serger, it did the cutting and sewing for me. I don't know how I ever got along without it... And since there was just enough leftover for a nursing pad on each prefold, I whipped up another 2 sets of them.


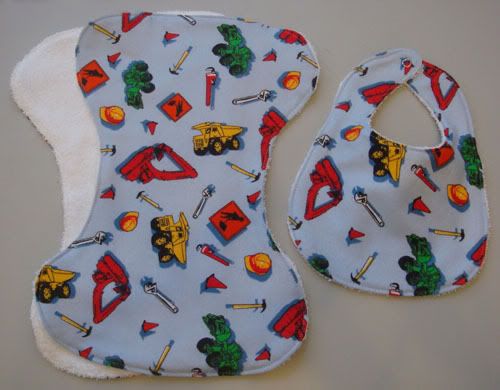
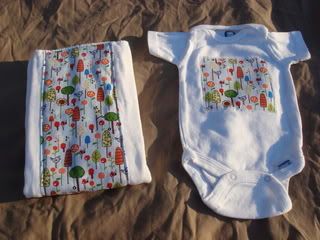
Next up is a few matching burps/bibs for a friend's beautiful new baby boy... these were the first of this style of burp cloths for me and I love how they turned out, I will definitely be making more of them. Everything is backed with an inexpensive (but super soft) towel I got at Target.


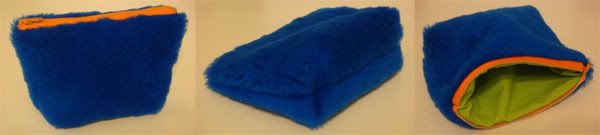
Then I had a custom request for a zipper pouch in furry fabric, so I whipped this up real quick like. I could probably make zipper pouches in my sleep, I love the instant gratification projects like this.

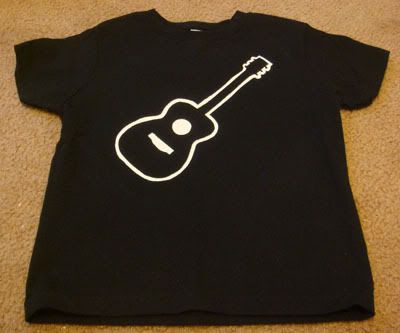
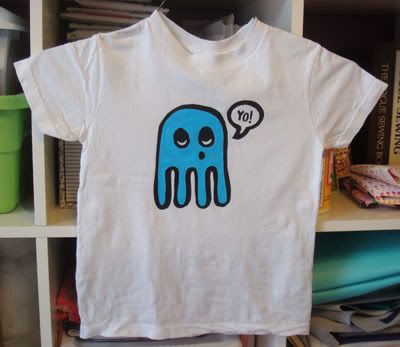
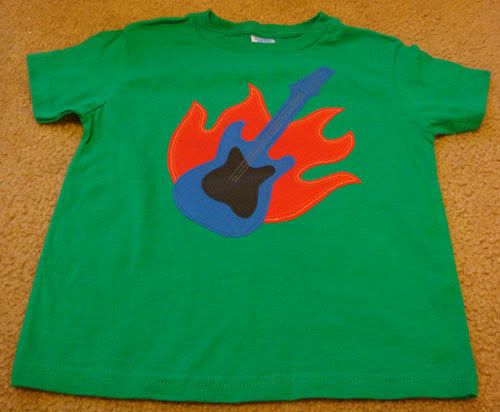
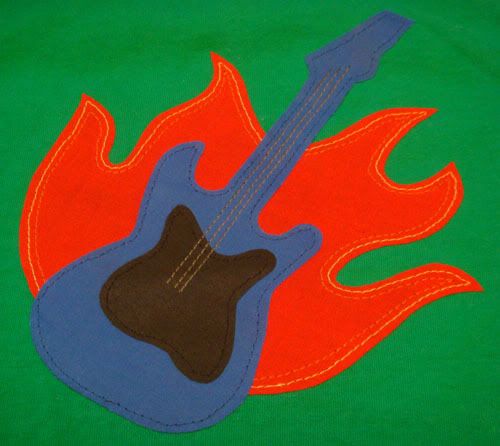
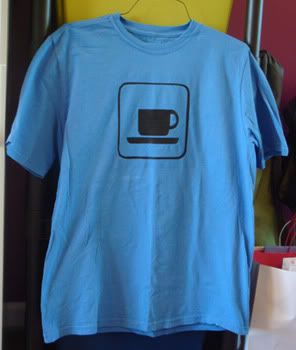
I finally managed to get all the shirts I wanted to make for my cousin's son into the mail, these are the last 3... 2 stenciled, 1 appliqued.
First is a simple acoustic guitar (stenciled), second is an octopus (black is stenciled, the blue I filled in after), and the third is my favorite kids shirt ever... a flaming guitar applique, I just love how it came together, all the little detail stitching and such.


I really wanted to make a nursing cover for myself, but it seemed like there was going to be no time for it... luckily I managed to squeeze it in (and find the boning that I needed for it). I used a tutorial similar to this one for it (I can't find my original link, but it's almost identical to this one), Free Pattern to Sew Your Own Nursing Cover. Instead of making fabric straps I cheated and used quilt binding (lazy) and I actually made mine reversible (because I love things that are reversible), the other side is just the polka dot fabric.

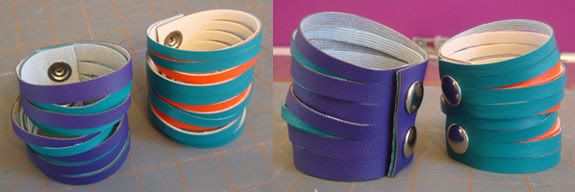
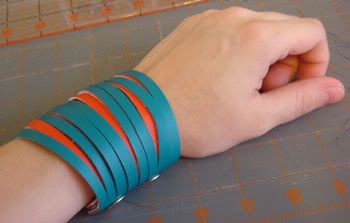
Then of course I got bored since I thought I was done with my crafting, so I decided to give some Naugahyde cuffs a go. I loved these by a local lady, Holly Aiken, Runway cuffs, but they are kind of pricey for me, so I figured I would try to make some myself since I have a TON of Naugahyde in my stash and snaps. I love how they turned out! I can't wait to pick up some more snaps and try out some other color combos.


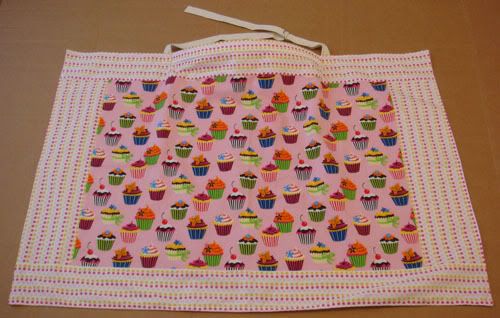
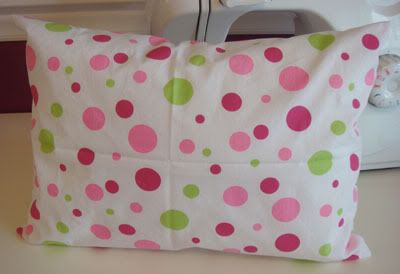
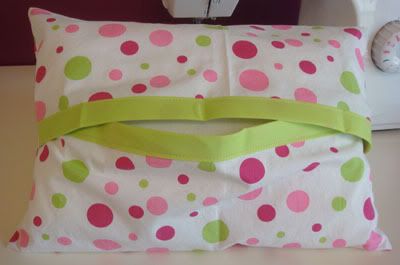
And then last but not least... I managed to get a matching pillow for my glider in the nursery made. I wanted to use the polka dot fabric that I used on the ottoman cover (because I ran out of corduroy), to tie it all together. The polka dot is a pocket style pillowcase over a homemade pillow form (it fits together quite nicely in the back, I pulled it apart for the picture to show how it works). I think it looks quite adorable in the chair.


And if you would like to see the whole nursery all put together with many projects previously seen here, you can check it out on my other (family) blog... ZELDA'S NURSERY!
3/22/2010
Well, it's been 20 days since my last post and I am exhausted. This will probably be my second to last post, as I will be heading into the hospital on April 8th (17 days!) to have this baby. But have no fear, I will be crafting up until then, there are still things on my to do list to get done.
So let's get down to it...
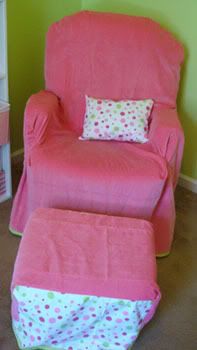
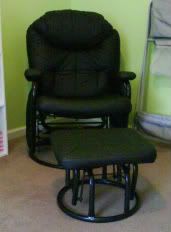
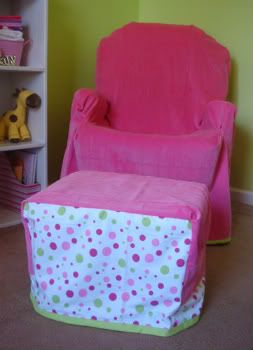
My mom scored this sweet glider/recliner with an ottoman for me for the nursery. Only problem, it's black, all over black not matching my white/pink/green in the nursery. So I decided I needed to make a cover for it, just something to slip over that would come off easily for washing. It's not my best work as I mostly just draped, pinned, sewed, pinned, sewed, etc... and I ran out of the pink corduroy for the footstool so I had to get creative with it. But I think it turned out cute, it's nice and matchy in the nursery now and it will serve it's purpose.
Here's a before after shot of the chair, uglying up my cute nursery...

And now, after... so cute!

I decided I needed a few more sets of reusable nursing pads, so I serged up a few more (3 more birdseye/lightweight sets and 4 x6prefold/heavyweight ones), I should be all set now!


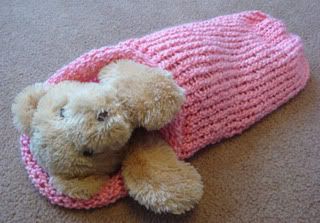
Then I started having trouble with my feet swelling if I spent too much time sitting with my feet down (like at the sewing machine) so I had to find something I could do sitting on the couch with my feet up. So I decided to get my circle Knifty Knitter looms out and "knit" up a baby cocoon in this cotton candy pink yarn I had in my stash. (Modeled by Q's bear "Mommy")


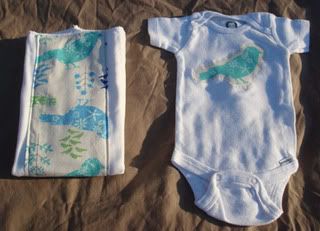
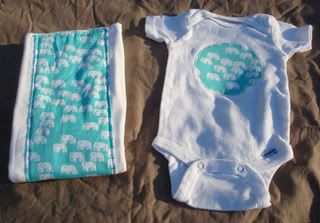
I also decided to make a few more onesie/burp sets in some of the leftover fabric from making BabyZ's dresses.


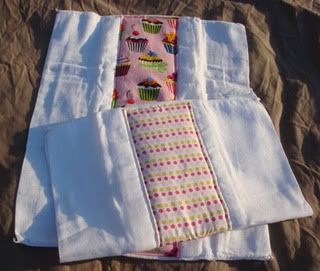
And then while I was at it, I whipped up 2 burps for myself, gotta have some cute stuff in my diaper bag too!

I also decided it was time to finally make a Triforce onesie for BabyZ (it's actually a pink onesie, just hard to tell) and a Big Brother/Little Sister for her and Q.


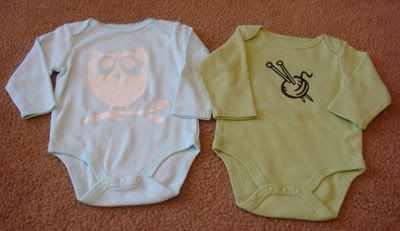
And I also made a few other onesies (for gifting/swapping)... it's hard to tell but the white image on the aqua onesie is an owl, it's cute, just hard to photograph.

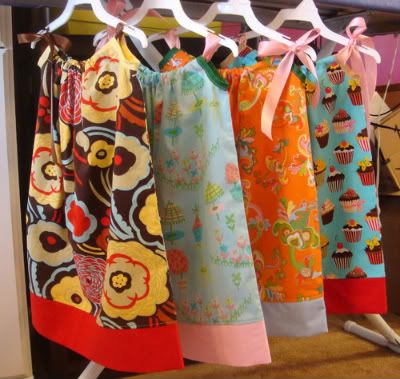
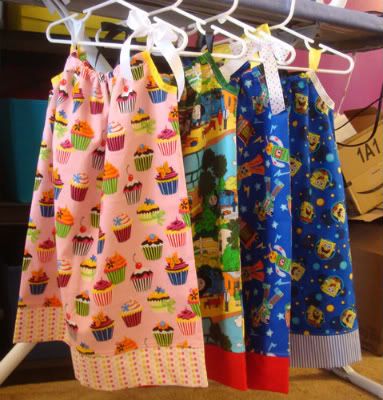
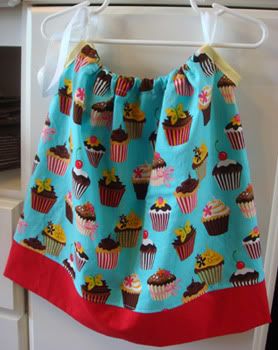
And if all that weren't enough, I decided to make a batch of pillowcase dresses (using the Owly Baby "Betsy" Dress pattern, she is such a nice lady and makes some seriously cute stuff, check out her etsy shop if you get a chance!) to sell in my etsy shop. I am hoping to make some $$ off them so I can buy the cloth diapers I want (they are NOT cheap up front, but in the long run will save us a TON, think thousands of dollars). I didn't CD with Q but I am really looking forward to giving it a go this time around, cloth diapers now are just as easy as disposables, just snap/velcro and go, no folding/pins/etc... Ok... enough diaper rambling, back to the dresses! So I made a dozen dresses for my etsy shop, 3 different sizes, using fabrics in my stash, as well as binding from my stash (which was fun and often tricky to match up) and I did end up having to buy some ribbon, but most of it was from my stash (that also got a little tricky with matching things up). I love how they turned out. I think the cupcake ones and the Spongebob (YES, Spongebob!) one are my favorites.
6 month sized dresses...

12 month dresses

2T dresses...

And now I am off to list all those dresses in my etsy shop (going to be a long afternoon)... and hopefully I can get a few other things that I need to sew this week cut out as well. *fingers crossed I can actually check everything off my to do list before Baby comes* See you in 2 weeks!
3/2/2010
A new month is upon us! Only 37 more days until Baby joins us (I don't remember if I mentioned it or not, but we actually have a date now, repeat c-section scheduled for April 8th)... so I REALLY need to stay on the ball this month if I want to get everything done before she gets here!
So let's get started...
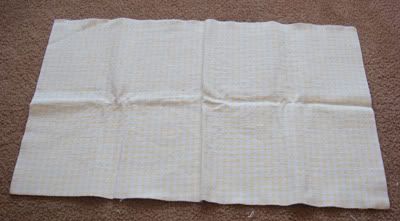
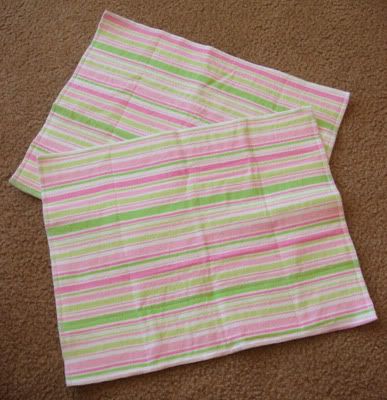
First up is a reconstructed project. I took an old waterproof pad we had used with Q (about the size of a changing pad), that was starting to pill and peel off it's backing (and was yellow gingham and I don't like yellow) and I cut it in half and then stitch some pink and green striped flannel to the top and then serged the edges... now I have some cute new waterproof pads that match the nursery (I love using them on the changing table to keep from having to change the changing pad cover so often).
Before

and After!

I wanted to add a little something to the other gifts I had made the week before (the changing pads) so I made a few little appliqued onesies...
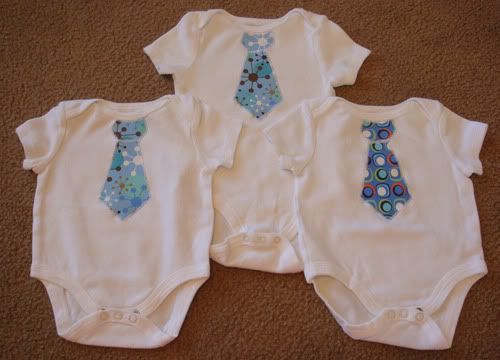
I made 3 Tie onesies, so cute for little boys!

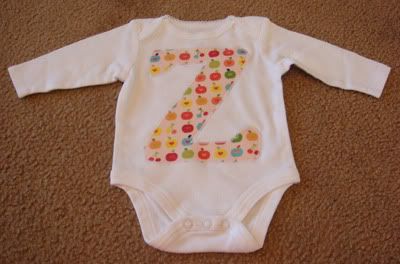
And so Baby didn't feel left out, I made her an initial onesie (yes, that is a "Z")!

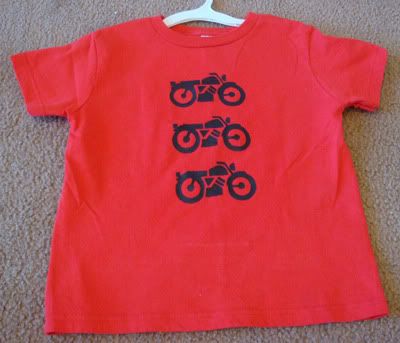
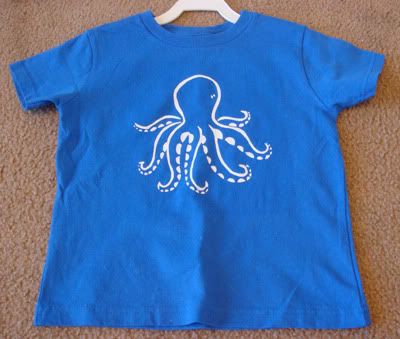
While I was decorating onesies I figured I would go ahead and finish cutting out a few stencils I had started for some shirts, so I also managed to get 3 shirts stenciled...
A motorcycle one (for my cousin's son, he's not quite a year older than Q)

An octopus one for Q (he picked out the image, the shirt color and the paint color)

And the last one I made because I had the shirt in my stash and I thought the image was perfect for stenciling... it has since been claimed by Husband.

And to finish up this week's post... the last of the baby dresses... at least for now! I have more fabrics that I would like to use for dresses, but I think at this point she's got enough dresses to get her started.
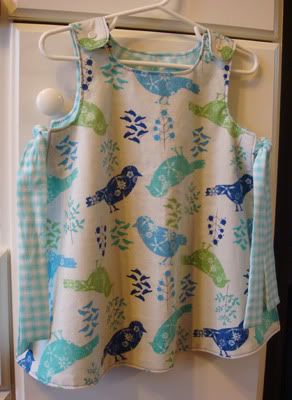
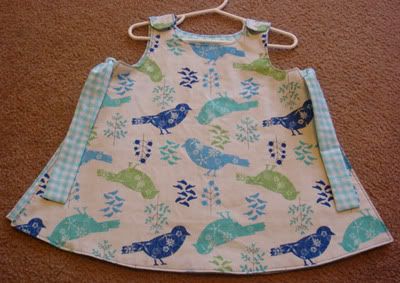
I used McCall's pattern #2213 for both dresses. Super easy pattern to follow and the dresses were really quick to both cut out and sew.
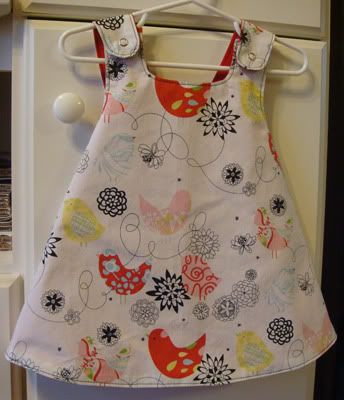
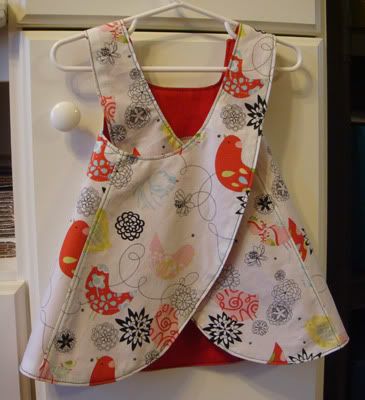
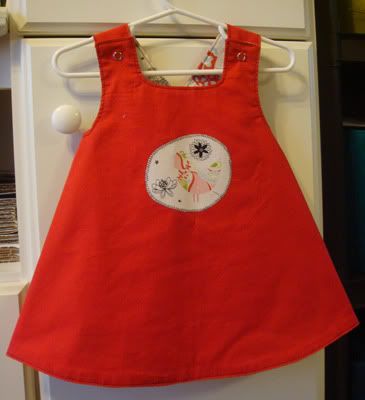
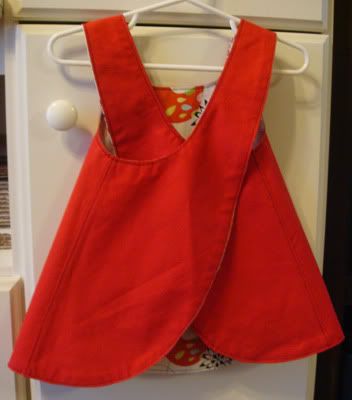
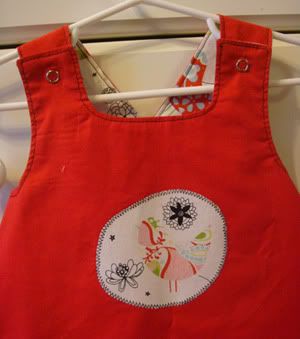
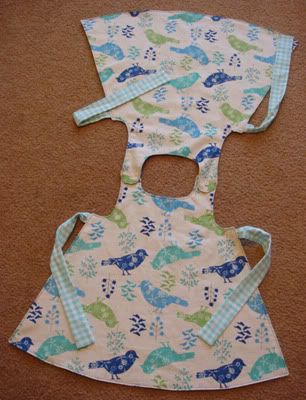
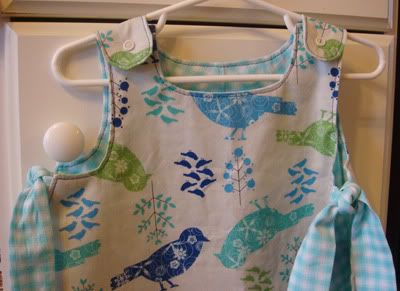
The first one is View A (size Small, 13-15lbs), in a super cute bird fabric (thanks, Aimee!) that's reversible to a solid red (with a bird applique).


And the second is View D (in size Large, 19-21lbs), in another cute bird fabric with a coordinating aqua gingham. It could also be reversible but it would just be plain gingham on the other side, not very exciting. As you may be able to see from the photos, the dress when untied and unsnapped is actually 2 pieces...


2/23/2010
ACK! I can't believe it's been over 2 weeks since my last update... I've been making stuff, I just haven't had time to get pictures of it and update here since I was busy trying to get ready for Baby Girl's baby shower that was on the 20th (it was LOTS of fun)! So this is going to be a big one... been working on lots of cool stuff (though I still haven't managed to get the last 3 dresses made for the little lady).
I guess I will start with stuff for the nursery.
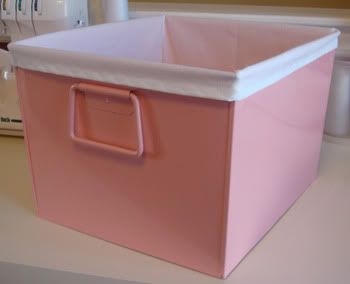
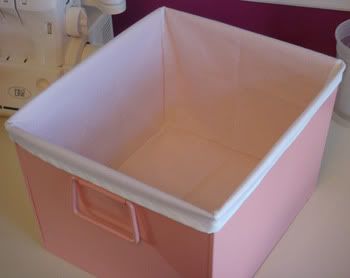
First up is a super quick and easy liner for a metal bin. I found the bin under my bathroom sink and the inside was a little worse for wear so I decided to whip up a fabric liner to put in it to protect all the little things that would end up in it in the nursery. Simple but effective.


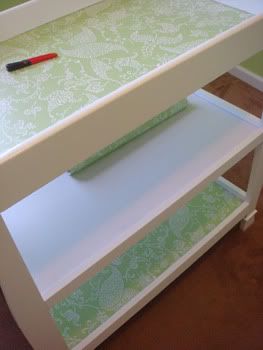
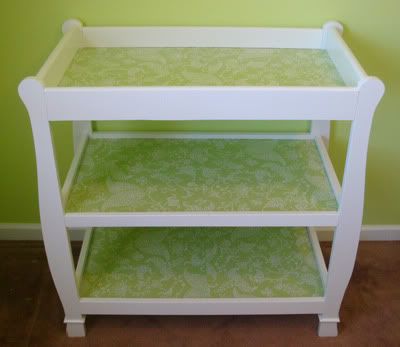
Next up in the nursery was the changing table... I bought it second hand and the shelves just weren't looking their best and plain white is boring, so I spruced them up with some contact paper. Again, simple but effective. Love it! (I didn't get a before shot of it so you will have to settle for one with the middle shelf still left to be covered, they all looked the same before, plain and white)


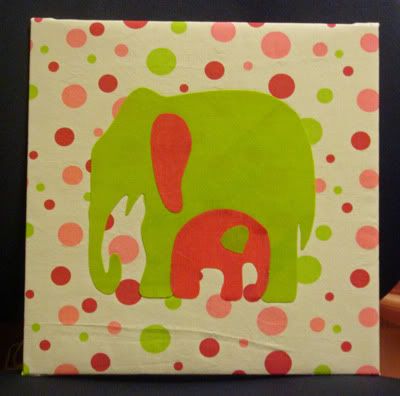
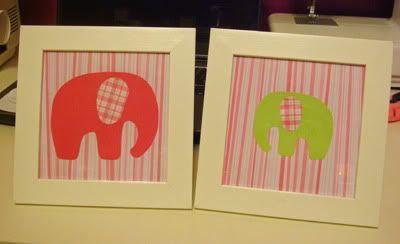
And lastly for the nursery were a couple different "art" pieces for the walls to go with the pink/green elephant theme... the first is made with fabric and heatnbond (mounted on a piece of 12x12 corkboard) and the 2 smaller ones are made from paper. I love how they turned out, just have to decide where to hang them...


Next up... how about some edible crafts...
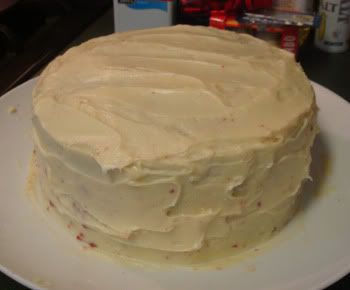
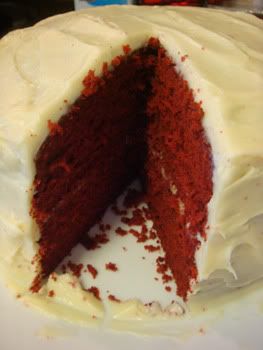
A Red Velvet Cake with Cream Cheese Frosting, made for my baby brother (yes, I know he's 23 now, ACK, but he will always be my baby brother), who's a Valentine's Day baby. Yes it was quite delicious and yes it was made from scratch.


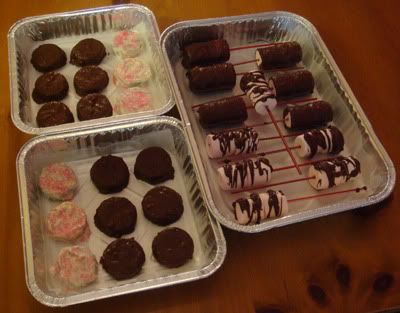
And some treats I whipped up for the shower. They are just pink (strawberry) marshallows either dipped in or drizzled with melted chocolate and then covered in pink sprinkles (which are hard to see) and oreos covered in regular and white chocolate, also covered in pink sprinkles... YUM!

Hmmm... what's next... how about some baby gifts... I know, gifts for OTHER people's babies... that's insanity!
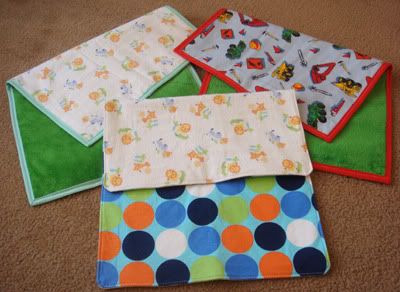
Another batch of changing pads... these turned out REALLY cute. They are reversible with flannel on one side and either a super soft terry/minky fabric on the back (that's the green) or a jersey knit on the back (that's the polka dots, that one is my fav). The ones with the green backs having binding all the way around, the other though was thin enough I could just sew it and then turn and topstitch it.

And another "Betsy" (pattern by OwlyBaby), pillowcase style dress, like I said before, for a gift for my husband's old officemate who is expecting a daughter in May. 
OK... how about some crocheted stuff!
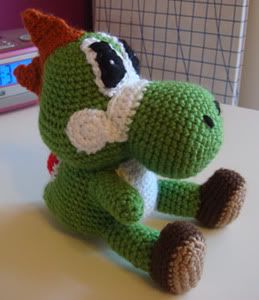
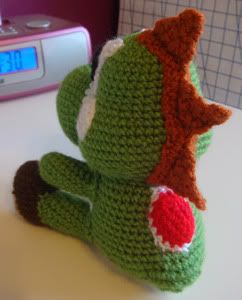
I FINALLY managed to fnished the Yoshi amigurumi I have been working on since October... I have 2 more of them started, hopefully I can get them finished in a timely manner... we'll see. Started with a pattern, but ended up working off it quite loosely since the pattern designer was not a native english speaker so following the pattern was a little tricky. I think he turned out quite despite it all!


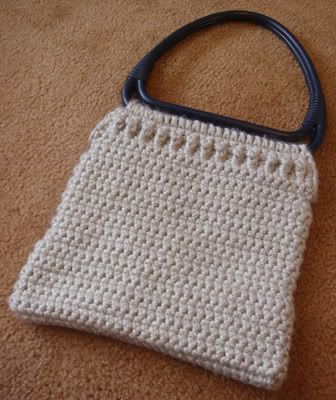
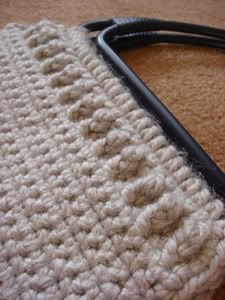
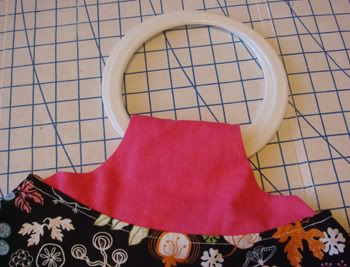
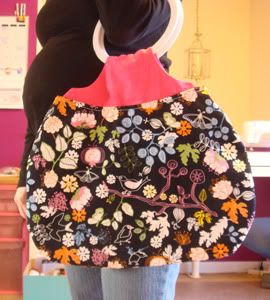
And a purse, made from a pattern I found in an early 80s "Learn How To Crochet" booklet... I happened to have the purse handles in my stash from swapping and when I saw the pattern that used the exact handles I HAD to make it! I love the puff stitches!


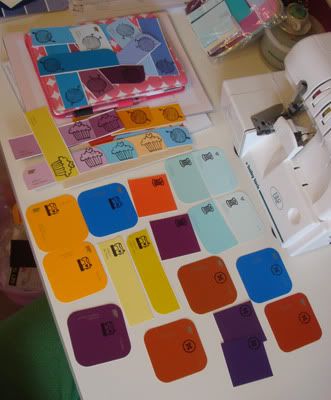
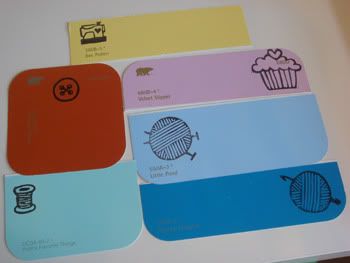
Oh! I almost forgot this super simple project. I use these little cards to write quick notes to send with swap packages. I had a TON of these paint color sample cards from when we've been picking out colors to paint different rooms (can you tell we like color, you should see the house), and I couldn't figure out what to do with them until I realized they would be perfect for a little note, so I got out my stamps and went to work... they are perfect... another simple, but effective project!


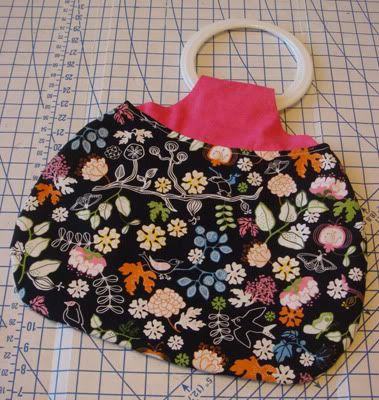
And last, but certainly not least... my FAVORITE project from the past 2 weeks... I made it today without much of a plan, these handles were also received via swapping and I knew I wanted to make a fabric purse with them, I just didn't know how to go about it... after much head scratching I came up with this design and I LOVE IT! I want to keep it, but I will probably swap/sell it away, I don't need another purse, especially one that wouldn't make a very good diaper bag.